Roller shades are one of the most DIY-friendly window treatments because the hardware is simple and forgiving compared to complex drapery tracks or layered systems. The key is getting two things right: bracket placement and a level install. If the brackets aren’t square, the fabric will “walk” to one side and start rubbing, which shortens the life of the shade.
This guide walks you through a clean installation for both inside mounts and outside mounts, with practical measurements, tool choices, and troubleshooting tips. If you’re still selecting materials, you can configure your exact build in the World Wide Shades online tool at /builder and order samples at /swatches before committing.
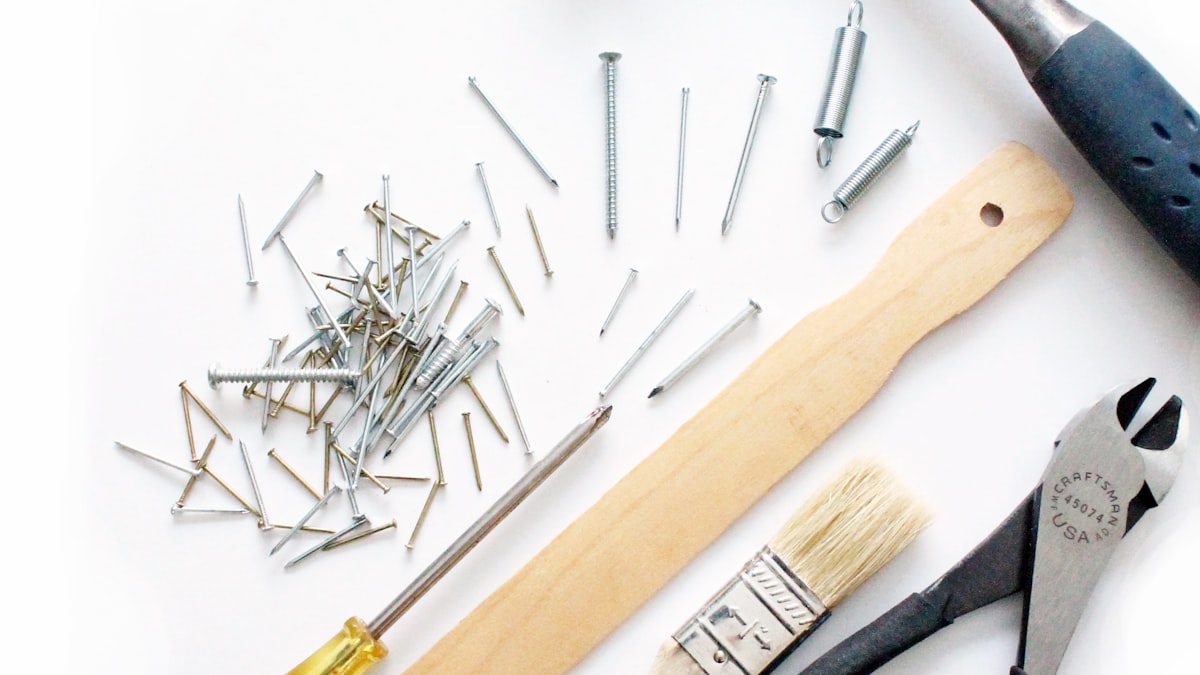
Tools and materials you’ll want on hand
A professional-looking install is mostly about using the right basics.
- Tape measure (preferably with 1/16-inch markings)
- Pencil
- Level (a 24-inch level is ideal; a small torpedo level also works)
- Drill/driver
- Bits: 1/16-inch for pilot holes in wood, 3/16-inch for drywall anchors (varies by anchor type)
- Screws provided with your shades (or #8 pan-head screws as a backup)
- Stud finder (helpful for outside mounts)
- Step stool or ladder
If your window frame is drywall or plaster (not wood), plan on using anchors unless you can hit a stud. Most roller shade brackets are light, but wide shades create leverage when you pull a chain or when a motor starts/stops.
Inside mount vs. outside mount: choose before you drill
The mount style changes where you measure and where you put the brackets.
Inside mount looks built-in and keeps the shade aligned with the window frame. Choose inside mount when:
- Your window has enough depth for the roller tube and brackets
- You prefer the cleanest trim line
- You’re comfortable with small side light gaps
Inside-mount shades are typically mounted to the top of the window jamb (the “ceiling” of the opening) or to the sides of the jamb.
Outside mount provides more coverage and can reduce light bleed at the edges by allowing the fabric to overlap the frame. Choose outside mount when:
- Your window depth is shallow
- You want better privacy and light control
- There are obstructions inside the opening (cranks, alarm sensors)
Outside-mount shades are usually mounted above the casing, centered over the window.
Step 1: confirm your shade orientation and controls
Before you hold anything up to the window, identify:
- Which side the clutch or chain control is on (or motor side)
- Which way the shade rolls (standard roll vs. reverse roll, if applicable)
Standard roll typically places the fabric closer to the glass when lowered; reverse roll brings the fabric closer to the room and can clear handles or trim projections. Make sure the roll direction matches your window needs before you install.
Step 2: mark bracket positions (inside mount)
Inside mount usually looks best when the shade is centered and the brackets are set back evenly.
- Measure the inside width at the top of the opening and note the dimension.
- Mark your bracket locations on the top jamb, keeping each bracket about 1 1/2 to 3 inches from the side jamb.
- If your shade is very wide (over about 60 inches), a center support bracket may be included. Mark it centered between the side brackets.
Brackets mounted too close to the very edge can crack older wood frames, and brackets mounted too far inward can cause the shade to rub the jamb.
Step 3: mark bracket positions (outside mount)
Outside mount is all about symmetry and coverage.
- Decide how much overlap you want on each side. A typical overlap is 1 1/2 to 3 inches per side.
- Mark a level line above the window for your bracket height. A common starting point is 2 to 4 inches above the top casing, higher if you want the stack (rolled fabric) to clear the window.
- Mark the left and right bracket positions using the shade width and your chosen side overlaps.
If you can, align at least one screw per bracket into a stud. If not, use anchors rated for at least 20–30 pounds per anchor. The forces are small, but repeated operation over years can loosen weak anchors.
Step 4: drill pilot holes and mount the brackets
Pilot holes are the difference between a quick install and a split frame.
- For wood frames: drill a small pilot hole (often 1/16-inch) at each screw mark.
- For drywall: drill the correct size for your anchor system, insert anchors flush, then drive screws.
Mount the brackets firmly, but don’t over-torque screws to the point that the bracket bends. Use the level to confirm the brackets sit on the same plane. If the window frame is slightly out of square (common in older homes), shimming one bracket may be necessary.
Step 5: install the shade into the brackets
Most roller shades install by inserting one end (often the pin end) into its bracket, then compressing or clicking the clutch end into the opposite bracket.
- Insert the non-control end first.
- Align the control end with the bracket slot and press until it clicks.
- Give the tube a gentle pull to confirm it’s seated.
Once installed, operate the shade up and down a few cycles to ensure smooth movement.
Step 6: set the chain tensioner or safety device (if chain-operated)
If your shade uses a chain loop, the tension device keeps the chain stable and improves operation.
- Place the tensioner so the chain stays taut but not stretched.
- Mount it securely to the frame or wall according to the included hardware.
Child and pet safety matters. Keep cords out of reach and consider cordless or motorized options for nurseries and kids’ rooms.
Step 7: test for level and adjust
A shade can be “level enough” visually but still drift. The test is the fabric edge.
- Lower the shade fully and watch whether the fabric tracks toward one side.
- If it walks left or right, the brackets aren’t perfectly level relative to each other.
Small corrections:
- Loosen one bracket slightly and nudge it up/down by 1/16 to 1/8 inch, then retighten.
- Add a thin shim behind one bracket if the mounting surface is uneven.
Troubleshooting common problems
Most DIY issues are easy to fix once you know what to look for.
This usually means the shade isn’t centered or the brackets are angled.
- Recheck that each bracket is the same distance from the side jamb.
- Confirm both brackets sit flat; drywall texture or trim profiles can cause tilt.
Fabric “telescoping” happens when the tube is slightly out of level.
- Use a level across the brackets and adjust one side.
- If your window is very out of square, you may need to prioritize smooth tracking over perfect visual symmetry.
On spring-assisted shades, tension may need adjustment. On clutch shades, the clutch could be mis-seated.
- Confirm the tube is fully clicked into the bracket.
- If the system includes a tension adjustment, make changes in small increments and retest.
- Make sure the chain isn’t twisted.
- Check that the tensioner isn’t pulling the chain at an angle.
- If the shade is wide, confirm you have the correct clutch size for the fabric weight.
When to choose a pro install instead
DIY is great for straightforward windows. Consider professional help when:
- Windows are very high or above stairs
- You’re installing multiple large motorized shades at once
- The mounting surface is brittle plaster or metal framing
- You need side channels or an exacting blackout setup
Even if you DIY, it’s worth having a second person help hold wider shades while you mark holes. A 70-inch-wide shade can be awkward to align solo.
Cross-links: related posts to help you choose the right build
If you’re still finalizing what to order, these posts can help:
- /blog/roller-shades-rental-apartment for renter-friendly strategies and hardware choices
- /blog/smart-home-motorized-shades-setup for motor options and control planning
- /blog/light-filtering-shades-guide for privacy, glare, and daytime light balance
FAQ: roller shade installation
Some renters use tension rods or adhesive solutions, but most roller shades are designed for a bracket-and-screw installation. For rentals, choose an inside mount when possible and use existing trim locations to keep holes minimal.
A common range is 2 to 4 inches above the top of the window casing. Mounting a bit higher can reduce light leaks at the top and makes the window feel taller, as long as the shade still clears the window when raised.
Many frames aren’t perfectly level, especially in older homes. Prioritize smooth shade tracking: use shims behind one bracket so the roller tube is level even if the trim line is not.
If you can’t drive screws into wood or a stud, anchors are recommended. Use anchors rated above the shade’s weight and avoid soft, low-grade plastic anchors for wide shades.
Ready to order and install?
Start your custom build at /builder, order fabric samples at /swatches to confirm color and texture in your own lighting, and contact the team through /contact if you want help choosing the best mount and hardware for your windows.